Ever found a file or folder that can’t be erased or deleted, either on your hard drive, flash disk, or even your Android smartphone’s internal memory, guys?
Wow, it must be really annoying!
Most of you would expect this to be caused by a virus. But in reality, not everything comes from it, you know.
This time, TechTanker will give you a tutorial on how to delete files that can’t be deleted, whether on Windows or Android. Come on, see more!
Before you take action to delete the undeletable files, you can first try these simple tips and delete these files:
- Close all the programs.
- Restart your computer or phone.
- Let the antivirus scan your computer to see if there’s a virus on your computer and get rid of it.
Table of Contents
Collection of Reasons Why Files or Folders Cannot Be Deleted
As TechTanker mentioned before, not all causes of this problem are caused by viruses or malware that attack your PC or smartphone.
Well, if you check using various antivirus applications, you might not find anything, aka your PC, laptop or smartphone.
Then what causes the file or folder to be deleted?
Next, TechMint has summarized a number of reasons, before you follow the steps that will be reviewed in full below, guys.
- The folder or file in question is still active or used by other programs.
- The file is being used by another user.
- The file or folder has permissions (licenses) are strong.
- And other reasons unknown.
How to delete files that cannot be deleted on a Windows PC or Laptop
One of the easiest ways to delete files or folders on Windows is to use third-party applications.
In addition, you can also use the method to delete files that cannot be erased with the Command Prompt alias CMD, even though this method is quite confusing.
1. Via Software Unlocker
The first and easiest way, you can use a third-party software called Unlocker to delete stubborn files or folders on your PC or laptop.
How to? Come on, follow the steps below.
- Step – 1: You must first download and install Unlocker software on your PC or laptop. TechTanker has also provided the download link below, yes!
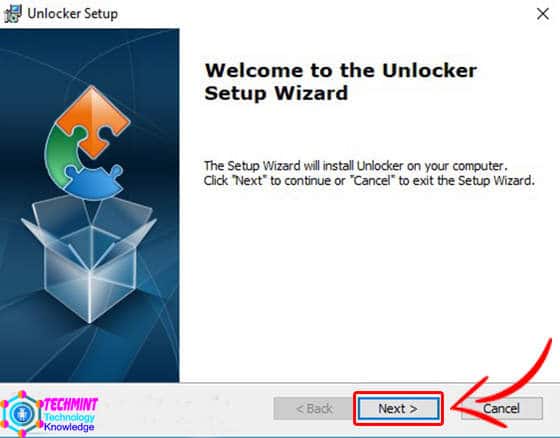
- Step – 2: After downloading the Unlocker file, you can just do the installation step. Double-click the Unlocker installer and the Unlocker Setup window will appear. Here you just click Next for the next process.
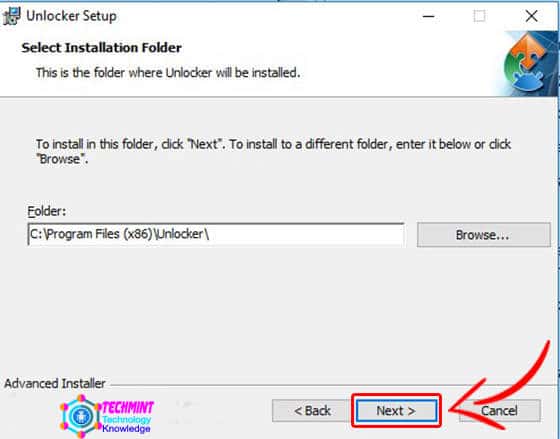
- Step – 3: Then you will be asked to choose a directory to install Unlocker by clicking Browse …If you want to use the default settings, you just click Next again.
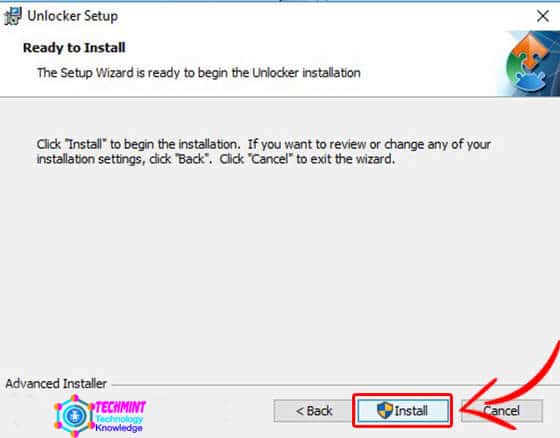
- Step – 4: Finally, you just click the Install button before installing Unlocker on your PC or laptop. The installation process will run quite briefly because the file is not too large.
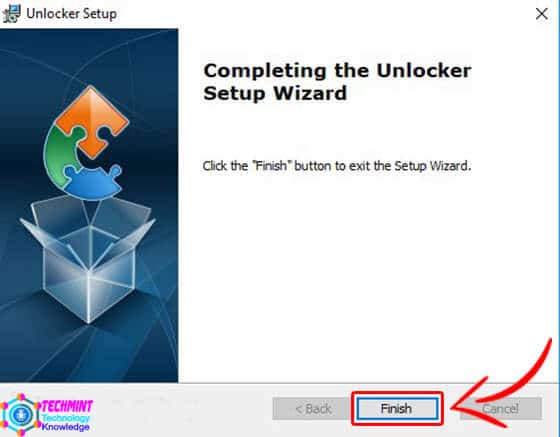
- Step – 5: If the Unlocker installation process is complete, you just click Finish.
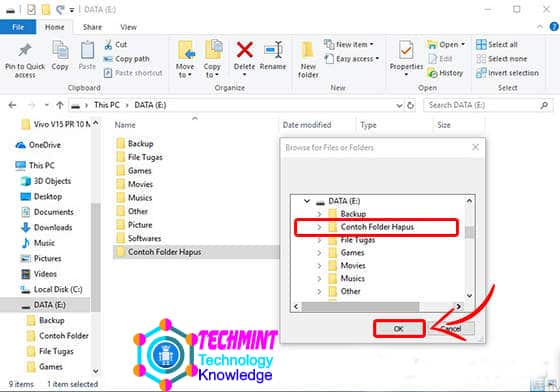
- Step – 6: To start deleting non-deleted files or folders on a Windows PC or laptop, double-click on the Unlocker software that has been installed. Select the directory where the file or folder is located. Click OK.
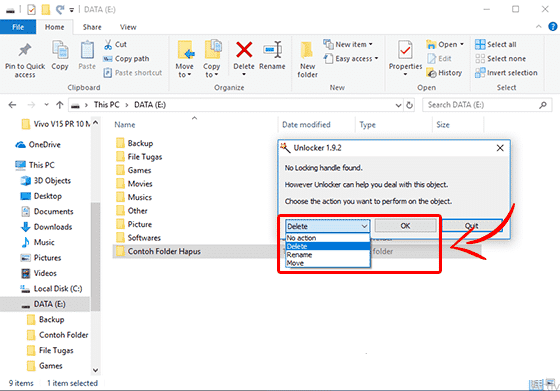
- Step – 7: The Unlocker window will open. Here you just choose the Delete option on the dropdown button that is already available. Click OK again.
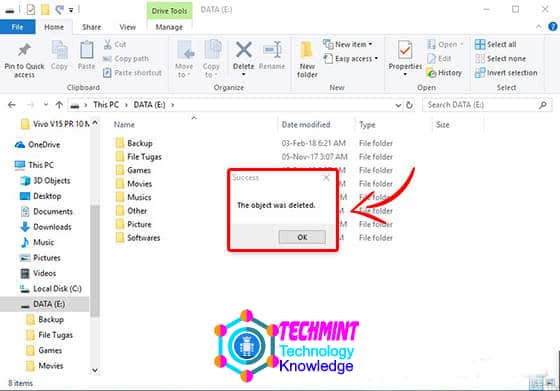
- Step – 8: The process of deleting files or folders using Unlocker will run for a while, and if it works then a window that says “The object was deleted” will appear. Then the file or folder was deleted and you just click OK to close the Unlocker window.
How to delete files that can’t be deleted on an Android phone
Besides on a PC or a Windows laptop, this problem is also sometimes found on your Android smartphone, guys. But calm, there is also how to deal with it.
Whether using the default application or available on the Google Play Store, complete the TechTanker review below.
1. Via SD Card Cleaner Application
If the way to use GO Files is still ineffective, you can also use an application called SD Card Cleaner.
Besides being able to clean an external microSD card, this application is also powerful for deleting files or folders on internal storage.
Then how do you use it? The following is a complete TechMint review, guys.
- Step – 1: If you don’t have an SD Card Cleaner application, you can download and install it directly through the link that TechMint has provided below.
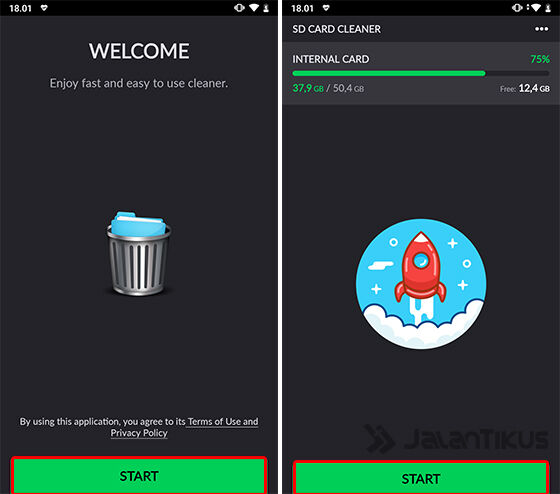
- Step – 2: Then you open the SD Card Cleaner application that has been installed. Tap Start to start using SD Card Cleaner and tap Start once again to start scanning the junk files on your Android phone.
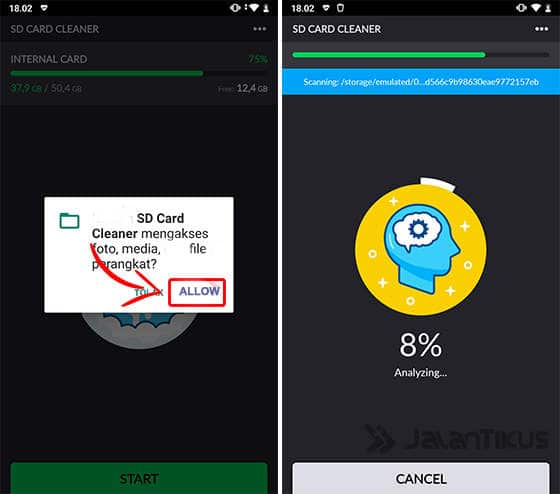
- Step – 3: You will get a pop-up to activate permissions, tap Allow to continue the process. Then the SD Card Cleaner application will start the scanning process. Usually, this process will only take a few minutes.
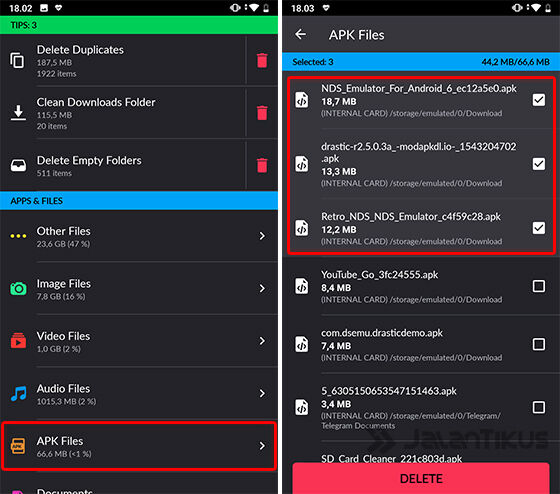
- Step – 4: Here TechMint will try to delete the APK file that has become trash in internal memory. Tap the APK Files option then mark which files you want to delete and tap Delete if you are sure.
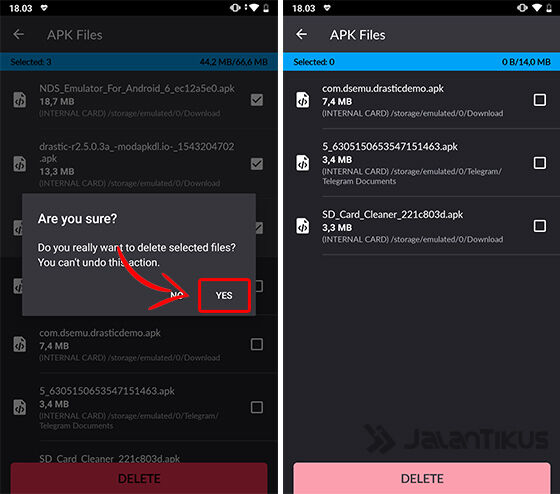
- Step – 5: The SD Card Cleaner application will confirm once again before deleting the file on the Android phone. Tap Yes if you are sure and the file will immediately be erased from your smartphone’s memory, guys.
Conclusion
Those are the steps for deleting files or folders that can’t be erased on Windows and Android, guys.
If you follow it carefully, surely you can do it. If indeed the file or folder is still difficult to erase it could be due to a virus.
Here you can immediately scan with the most updated antivirus application. Good luck and good luck!
